 |
|
|
|
|
|
|
|
|
|
|
|
|
|
|
|
|
|
|
|
|
|
|
|
|
|
|
|
|
|
|
|
|
|
|
|
|
|
|
|
|
|
|
|
|
|
|
|
|
|
|
|
|
|
|
|
|
|
|
|
|
|
|
|
|
|
|
|
|
updated 10/26/19
| Home | Introduction | Reference | News | For Sale |
| Senior Does1 | Senior Does2 | Senior Does3 | First Fresheners | Bucks |
| Yearlings | Junior Does | Kidding Schedule | Lawn Ornaments |
I had several low waste hay feeders that I had built along the general lines of others I had seen in use and on the internet. The basic design I used was to start with a v-feeder like that shown in plans published by the Saskatchewan Agriculture Family Farm Improvement Branch. We added to this a 2nd layer of slats set on a slant on both long open sides, to help prevent animals pulling their heads back out while eating and dropping hay on the ground. We also added a plywood lid. A similar design, but smaller and one sided, has been produced for sale by Wyl Smith in Maine for local pickup. With their large number of pieces, these hay feeders are a bit laborious to put together, but are far far superior to putting hay in racks or on the ground. But there was one really vexing problem with the design I had been using: the vertical slats on the outside permit the smaller members of the herd to climb in and settle down for a nice long chow with no need to get up for bathroom breaks. Since the whole purpose of the feeder is to keep the uneaten hay clean so that it will all be eaten...well, you see the problem. I tried adding wooden cross pieces to the outside, with the result that all of my goats developed bare patches at the base of their necks where they rubbed on the horizontal slats. And the smallest kids still climbed in.
One day I was walking through my local Home Depot when I spotted some pre-assembled PVC railings intended for use in building outdoor decks. Suddenly before my eyes I saw the interior of a new hay feeder, with the slatted frame to hold the hay already pre-assembled. In the end I've modified the design of the hay feeder to utilize these attractive, durable (so far) pre-assembled parts as the primary hay racks inside the feeder, and added calf panel pieces on the exterior to prevent unwanted occupants. I've also added rudimentary counter weights to the lid to make it easier to lift. Below I show step by step photos of the assembly of one of our feeders, and I will try to add some plans with measurements later. A lot of your dimensions will be dictated by the exact size of the deck railings you are able to purchase, but one rule of thumb is that the distance from the outside of the calf panels to the center of the feeder should not be greater than about 19", so the last bits in the center can be reached. Thanks go to Michael Covey, whose various body parts are shown in some of the photos--he is the handy guy without which these feeders would probably not exist at all!
And no, we don't build these to sell. If you want one built and can get there, see the link to Wyl, above.
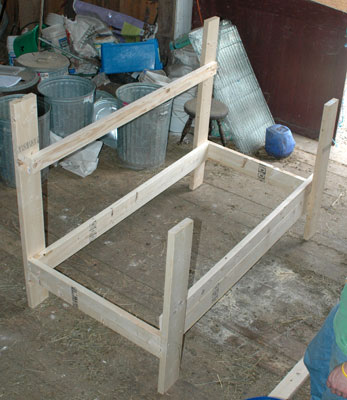 |
| Step 1: build the box |
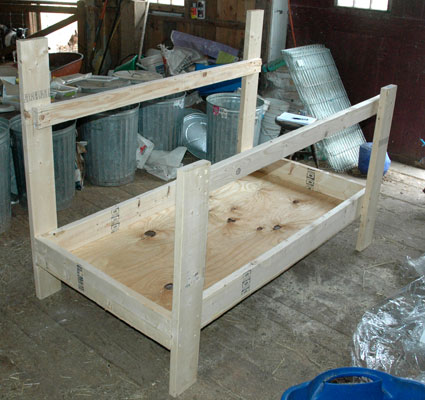 |
| Box with bottom of plywood and both front and rear support for interior railings in place |
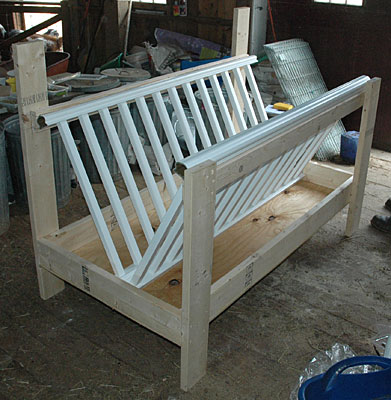 |
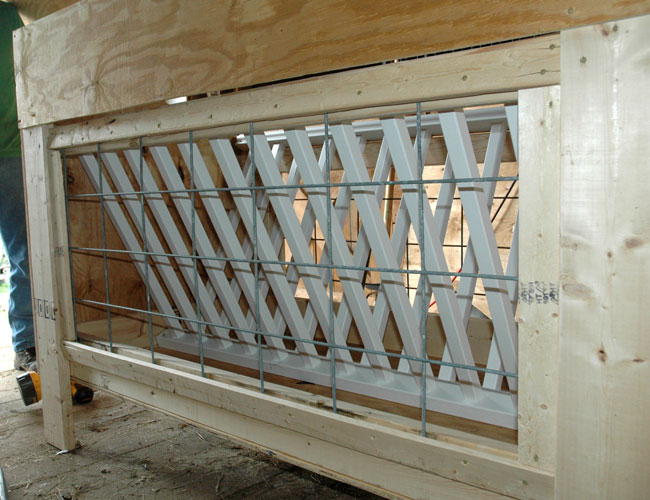
| Step 2: Add the PVC deck railings |
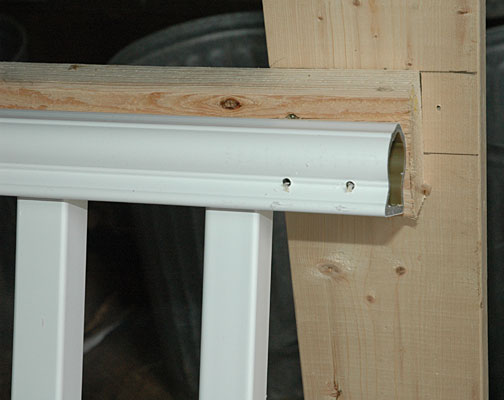 |
| Detail of fastening the rear railing; drill, then use long wood screws |
 |
| Detail of fastening the front railing; sits over the 2 x 4 for extra support |
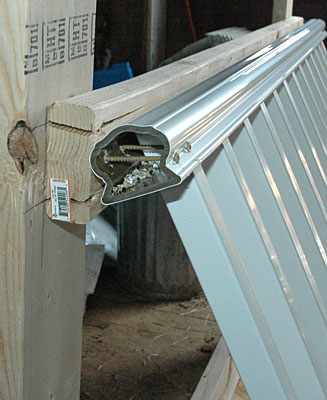 |
| End view of rear railing |
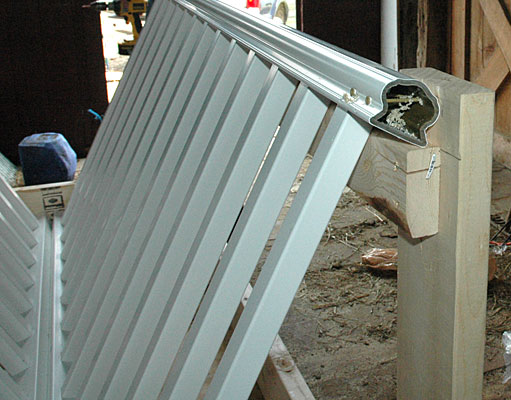 |
| End view of front railing |
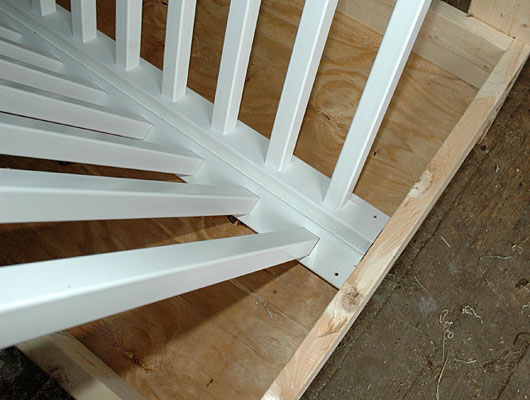 |
| Screw railings to bottom of box; you can use a 1 x 6 under the railings for a more solid base in which to fasten them; our first design (shown at the bottom) has this feature. |
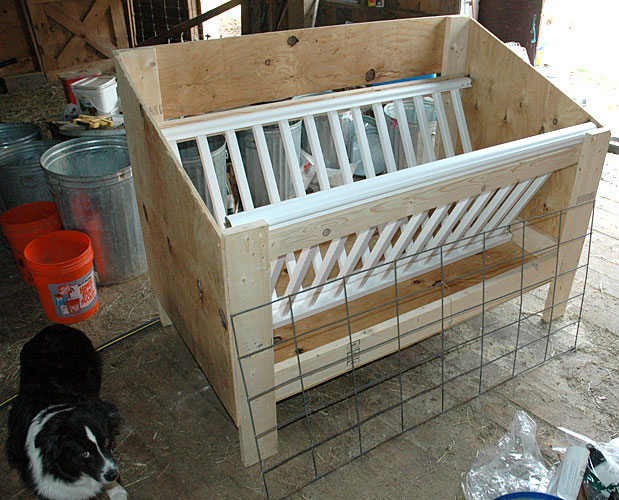 |
| Step 3: add sides and back of plywood. NOTE: the calf panel shown is cut TOO WIDE by one grid space. The final piece fits between the upright 2 x 6's. Aussie is optional. |
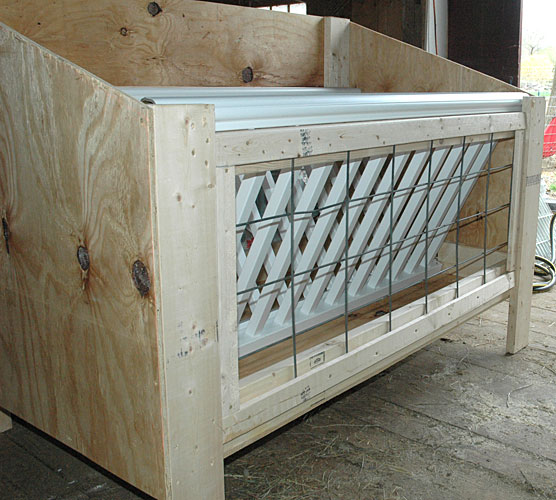 |
| Step 4: attach the calf panel outer pieces using a frame of furring strips--this is the front |
 |
| Step 4: attach the calf panel outer pieces--this is the back |
 |
| Step 5: hinges and 2 x 4's to which plywood lid is fastened |
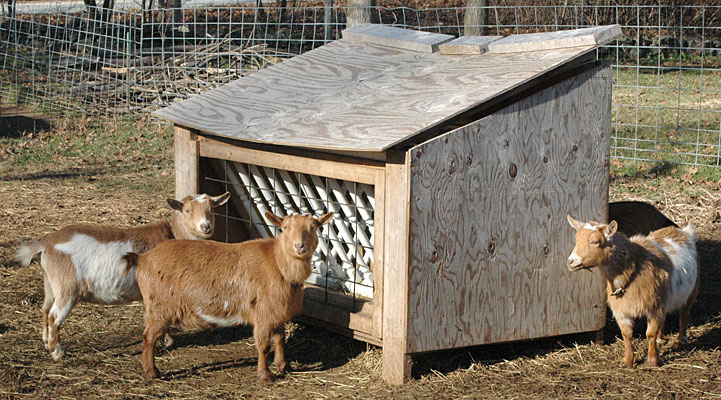 |
| Finished hay feeder in use, showing "counterweights" of scrap 2 x 6 on lid...you would not think it makes much of a difference, but it does. Leave a decent overhang at the rear of the lid to make the counterweights effective. This lid should have been a little wider on the right side, and could use a strip crosswise in the middle to support the lid so it doesn't sag. I left this off to save weight for ease of lifting. |
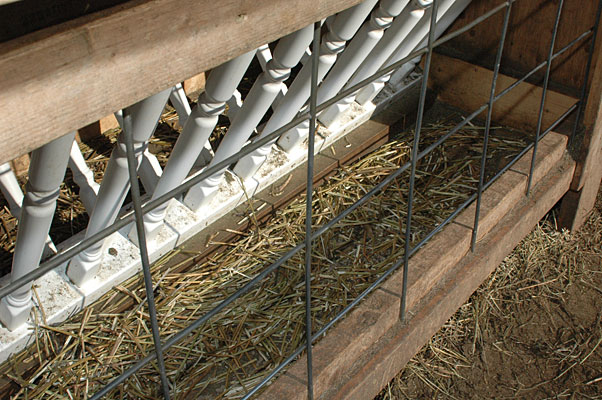 |
| Interior of hay feeder in use; this is the first feeder we made, and I think the fancy railings are pretty spiffy. This was a pretty coarse bale of alfalfa, and not much is left but the very roughest of the stems. There is not a lot of waste on the ground either, though there is some. And NO POOP inside!! |
I think we will find that after a few years of use the lids and possibly the bottom of the box may need to be replaced. But my worry that the deck railings would not be sturdy enough to withstand hay bales landing and goats pushing have so far proved unfounded. This feeder has been in continuous use for over a year by 20 + goats. This feeder can comfortably feed about 14 at one time, 16 in a pinch. My older feeders were able to handle as many as 20, because they were longer. I have retrofitted those older feeders with calf panels on the outsides and they work great as well, so if you have larger numbers you may want to visit the link at the beginning of the page, build one of those hay feeders with slats inside, in any length you want, and add the lid and calf panels as shown here. Or you can double the size by using 2 pairs of deck railings.
If anyone reading this page builds a feeder like this one, please send me a photo, and I will post it here with a link your web site, if you have one. Happy building!!
| Home | Introduction | Reference | News | For Sale |
| Senior Does1 | Senior Does2 | Senior Does3 | First Fresheners | Bucks |
| Yearlings | Junior Does | Kidding Schedule | Lawn Ornaments |
|
|
|
|
|
|
|
|
|
|
|
|
|
|
|
|
|
|
|
|
|
|
|
|
|
|
|
|
|
|
|
|
|
|
|
|
|
|
|
|
|
|
|
|
|
|
|
|
|
|
|
|
|
|
|
|
|
|
|
|
|
|
|
|
|
|
|
|
|